
How to Make Herb-Infused Oils for Extra Nutrition
DIY HERBAL RECIPES
In recent years, more people have started paying closer attention to the foods they consume, recognizing the powerful role nutrition plays in overall health. One way to boost the flavor and nutritional profile of your meals is by using herb-infused oils. Not only do these oils add an aromatic, gourmet touch to your dishes, but they are also packed with vitamins, antioxidants, and other essential nutrients that the infused herbs bring to the table. Best of all, making herb-infused oils is surprisingly easy and can be done right in your kitchen.
Whether you're a cooking enthusiast, a nutrition advocate, or someone simply looking to experiment with delicious new ingredients, learning the art of herb-infused oils is a game-changer. This article will walk you through everything you need to know to create your own customized blends at home—from choosing the right herbs and oils to safe preparation methods, storage tips, and creative uses.
Why Herb-Infused Oils?
Before diving into the process, let’s talk about why herb-infused oils are worth trying.
Nutritional Benefits
Herbs are loaded with nutrients, including essential vitamins, antioxidants, and phytochemicals that have incredible health benefits. Herbs like basil, oregano, thyme, and rosemary contain anti-inflammatory and antimicrobial properties that contribute to better immunity and well-being. When these herbs are infused into oil, their benefits are extracted and made easily digestible for the body.Enhanced Flavor
Adding a drizzle of herb-infused oil can transform even the simplest dish into a flavor-packed masterpiece. Imagine the earthy tones of rosemary oil on roasted potatoes or the citrusy brightness of dill oil drizzled over grilled salmon.Homemade and Customizable
By creating your own herb-infused oils, you control every aspect of the process—meaning no unnecessary additives, preservatives, or artificial flavors. You can tailor your oils to your specific tastes, dietary needs, and culinary preferences.Cost-Effective
Store-bought infused oils can be expensive, but making your own at home can save you money in the long run. All you need are herbs, a quality oil, and some time to create artisanal-grade infusions.
Step 1: Choose Your Base Oil
The foundation of any good herb-infused oil is a high-quality base oil. The type of oil you choose will depend on your intended use and flavor preferences. Some common options include:
Extra Virgin Olive Oil: Ideal for savory, Mediterranean-inspired infusions, olive oil has a rich, fruity flavor that pairs beautifully with most herbs.
Avocado Oil: With its buttery and mild taste, avocado oil is perfect for herb-infused oils you plan to use for drizzling or dressings.
Grapeseed Oil: A versatile, nearly flavorless oil that lets the herbs take center stage.
Coconut Oil: Best for sweet or exotic blends, coconut oil works well with herbs like mint or lemongrass.
Whichever oil you choose, go for quality over quantity. Cold-pressed, unrefined oils retain the most nutrition and flavor.
Step 2: Pick the Herbs
The herbs are the stars of the show here. You can experiment with a single herb or create a combination blend, depending on the result you’re looking for. Below are some popular options:
Basil: Sweet and aromatic, basil oil is great for Italian dishes like pasta and pizza.
Rosemary: Earthy, pine-like rosemary is perfect for roasted vegetables and meats.
Thyme: Subtly peppery, thyme adds depth to soups, stews, and marinades.
Chives: Chive-infused oil adds a mild oniony kick to dressings or eggs.
Cilantro: Great for Tex-Mex or Asian-inspired dishes, cilantro oil is bright and citrusy.
Garlic: Infusing oil with garlic adds rich, savory complexity to almost anything. (Pro tip: Combine garlic with herbs like rosemary for a two-in-one powerhouse oil!)
Chili Peppers: Add peppers alongside your herbs for an extra dash of heat and spice.
You can use fresh or dried herbs, though fresh herbs contain more nutrients. However, fresh herbs also contain water, which makes oils more prone to spoilage if not handled properly. If you're new to this process, it's a good idea to read the section below on safety precautions.
Step 3: Infusion Methods
There are two main methods for making an herb-infused oil: the cold infusion method or the heat infusion method.
1. Cold Infusion Method
This method is slower but preserves the delicate flavors and nutrients of both the herbs and the oil.
What You’ll Need:
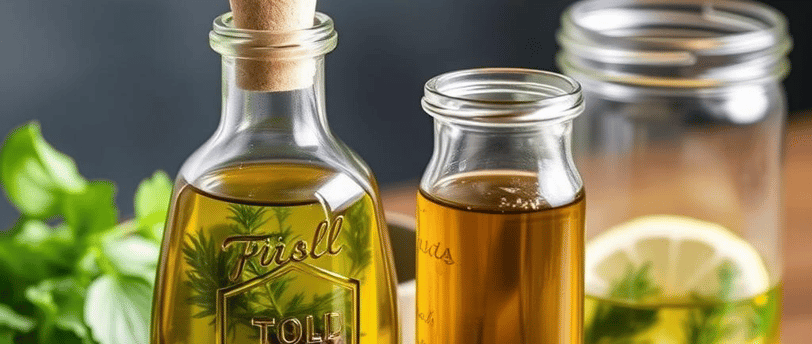
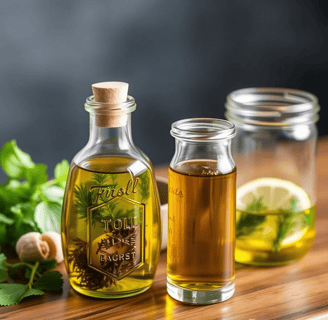
A clean, sterilized glass jar or bottle with a lid
Your herb(s) of choice, washed and thoroughly dried
Base oil
How to Do It:
Lightly bruise the herbs by smashing them gently with a rolling pin or the back of a knife. This releases their natural oils and aromas.
Place the herbs in the jar, filling it about halfway.
Pour the oil over the herbs, ensuring they are fully submerged.
Seal the jar and store it in a cool, dark place for 1-2 weeks. Shake it gently every few days to release more flavor.
Strain the herbs using a fine-mesh sieve, cheesecloth, or coffee filter, and transfer the infused oil to a clean, airtight container.
2. Heat Infusion Method
If you’re short on time, this faster method extracts the flavors and nutrients by gently heating the oil.
What You’ll Need:
A small saucepan or double boiler
Your herb(s) of choice, washed and thoroughly dried
Base oil
How to Do It:
Add the oil and herbs to a saucepan or double boiler.
Heat the oil gently on low for about 10-15 minutes. Avoid letting the oil come to a full boil, as this can impair the flavor and nutrients.
Remove from heat and allow the mixture to cool completely.
Strain out the herbs and store the infused oil in a clean, airtight container.
Step 4: Storage and Safety Tips
Storing herb-infused oils correctly is crucial to extend shelf life and prevent spoilage. Follow these tips to keep your oils fresh:
Refrigeration
Homemade herb-infused oils should be refrigerated to prevent the growth of harmful bacteria such as Clostridium botulinum. Even when refrigerated, use the oil within 3-4 weeks.Use Sterilized Containers
Make sure your jars or bottles are sterilized and completely dry before use to minimize contamination.Label and Date
Always label your oils with their creation date, so you know when they need to be discarded.
Creative Ways to Use Herb-Infused Oils
Now that you’ve mastered the art of making herb-infused oils, here are some creative ways to incorporate them into your meals:
Salads: Use them as a nutrient-rich base for dressings.
Marinades: Infused oils are perfect for marinating meats, poultry, tofu, or vegetables.
Cooking: Sauté vegetables or cook proteins with your infused oils for extra flavor.
Drizzling: Add a touch of elegance by drizzling over soups, pizzas, or breads.
Dips: Mix them into hummus, pesto, or yogurt-based dips.
Conclusion
Making herb-infused oils is a delightful and simple way to add both flavor and nutrition to your everyday dishes. From enhancing your favorite recipes to providing health benefits with every drizzle, these oils open up a world of culinary possibilities. Plus, the process of crafting them yourself is both cost-effective and fulfilling. With just a little time and creativity, you can transform basic oils into nutritious, flavorful masterpieces that elevate your cooking repertoire. So grab your favorite herbs, get started, and enjoy the flavorful benefits of herb-infused oils today!